FOLLOW US ON FACEBOOK and drop us a line to say hi :)
Showing posts with label cakes. Show all posts

Safari Cake

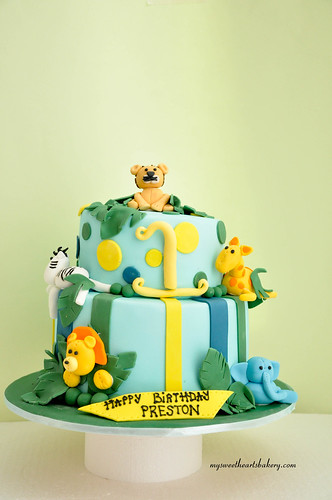
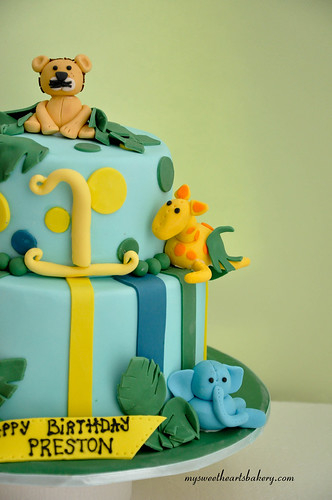
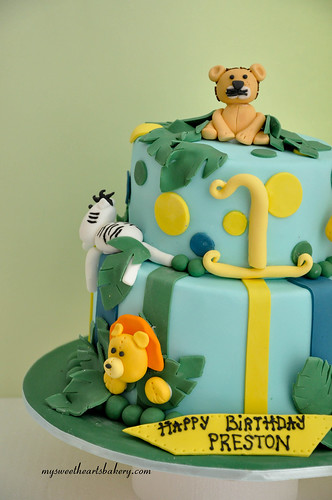
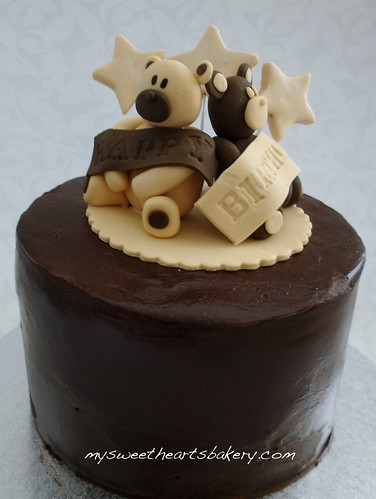
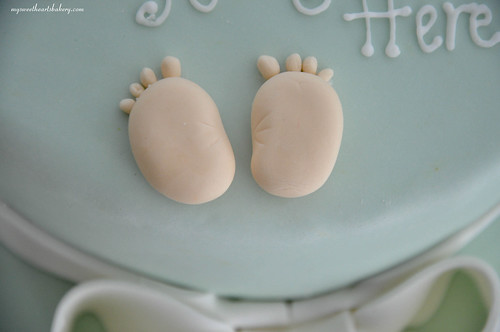
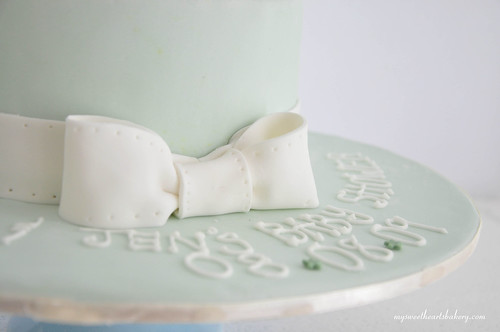
Introducing the SAFARI Paradise!
This time its for a 1 year old boy birthday and he absolutely loves animals.
This design was specially picked by his parents from Pink Cake Box.

SAFARI CAKE

SAFARI CAKE

SAFARI CAKE

SAFARI CAKE

SAFARI CAKE

SAFARI CAKE

SAFARI CAKE


Black and White Wedding Model Cake

I've been spending so much time working on model cake and i think this will be the last for another few months or so. I once saw this design online white searching for inspirations and i really wants to thank the person who made this design. If I'm not mistaken, i found the picture on Style Me Pretty.

I will now be working more on dessert tables and hopefully this weekend i will be able to finish my first project! Wish me luck :)


Black and White Wedding Model Cake

Black and White Wedding Model Cake

Black and White Wedding Model Cake


BABY SHOWER 2

This time its for a coming baby girl!!

BABY SHOWER

BABY SHOWER

BABY SHOWER

Spring/Summer Wedding Cake

Introducing Sunshine! My newest cake model for the Spring/Summer edition. 

I would highly recommend to couples looking for a spring and summery wedding.

Sunshine

Sunshine

more pictures here

Corset Bridal Shower

When A first approached me to make this for her wedding cake, i was like yea, its easy, i can do this (although it's my first time making a corset cake) But during the process, i realized nooooooo, it was more challenging that i though. Not the decorating part but cake assembling part. 


First was to get a pan big enough to bake a large sheet cake but somehow i couldn't find one that would satisfy the size i am after so i ended up baking 2 square 10 inches cake and put them together from there. 


Second was to draw the outline of the corset onto the transfer paper. I kept getting either a too fat or too thin corset, nothing went the way i wanted it to be! 
Lucky for me i had Jan over, i got her to do the drawing. She being the smart Jan that i always know used bowls to outline the perfect waistline for the corset! What a brilliant idea! (pats on Jan's shoulder) I wouldn't in a million years thought about that :P
Saved by Jan! We manage to get a perfect corset shape for tracing.  One big fear down! 


Next fear was the how am i going to transfer such a long cake (which has a seperation in the middle and covered with meringue buttercream) to the cake board without it falling apart and destroying the spread????

Cake bases!!!!


Yes, i used a really large 12" round cake base, chopped off the sides to fit the corset and TA-DAH! problem solved. I must take credit for the brilliant idea *giggles*


All fear down!! Lastly was the decorations. I must say that it went rather smoothly,  after all i am a part time cake decorator righttt?? :p

Here's my final product! ( Special thanks to helper Jan again)
*Please excuse my bad photography, i haven't been having much luck with camera lighting recently.

Corset Bridal Cake

Corset Bridal Cake

Corset Bridal Cake

Corset Bridal Cake


On a Sunday Afternoon

Winter's finally here. 
It's been so cold lately. Not that it is a bad thing, I love the cold and the rain especially on the days where i have no intention of leaving the house. Most of the time when it rains, it makes me wonder, makes me think, makes me dream. and also makes me hungry :)

ps: don't get me wrong but i love summer too!! 

Here's how Chico snuggles up during winter, under my bed in his little cubby hole 

Rainy Sunday 14.06.09

Remember in my last post about baby booties, rattle and teddies?
Its done! M collected it this morning and she absolutely loved it! :)

Baby Booties
Girl Christening Cake

Mini Baby Booties
Girl Christening Cake

Baby Rattle
Girl Christening Cake

Girl Christening Cake

Girl Christening Cake

Girl Christening Cake

Girl Christening Cake


Stay tune for another baby cake next week!

Birthday Cakes

I'm finally going to have a week of peaceful baking! For the past few weeks, i've just been in the kitchen baking on and on and on. Last week, i made 4 cakes, all covered in chocolate! Imagine how much chocolate licking i had.
*phew* I can now sit and relax and also catch up with uni :p

Chocolate roses with white chocolate ganache and white choc cake 
DSC02456

My very own favorite chocolate mud cake with ganache and teddies to compliment it :)
DSC02444

Last but not least a Butter cake!
new pics to

This is my very first own chocolate and cheesecake covered with ganache.
DSC02569

Inside of the top tier
DSC02624

A gift to Frank from me+Yoong
DSC02480
I'm craving for some cupcakes recently, hopefully, this week (sometimes) i get time to whip some up!
Toodles
Lilia~


Oreo Chocolate Cheesecake -Daring Baker's Challenge

This is my very first daring baker's challenge~! I'm so excited!

For April 2009 challenge is hosted by Jenny from Jenny Bakes. She has chosen Abbey's Infamous Cheesecake as the challenge. Yummy Yummy cheesecake. We are allowed to make some changes to the recipe and i've decided to use Oreo biscuits as the base instead of Graham crackers. 
MMMmmmMMM i love Oreo 
*twist lick and dip!* <----Oreo's slogan

When i read about the challenge about a couple of weeks ago and it was cheesecake i was like "yes!". I love making cheese cakes.
This reminds me of when i first started out baking, back in high school, my first couple of cheesecake attempt was a BIG failure= BURNT Cheesecakes. This is was because i didn't use 
the water bath method. Only when i started to read the recipe notes "carefully", i found out we were suppose to use the :steam oven: method! I felt really really silly for not reading it carefully *slaps my head* Well, i guess lesson well learnt! :)

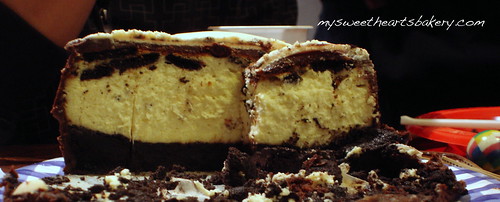
Abbey's Infamous Cheesecake:

Ingredients List:

Crust:

2 cups / 180 g Oreo cookies (crushed)
1 stick / 4 oz butter, melted

Cheesecake Batter:
3 sticks of cream cheese, 8 oz each (total of 24 oz) room temperature
1 cup / 210 g sugar
3 large eggs
1 cup / 8 oz heavy cream
1 tbsp. lemon juice
1 tbsp. vanilla extract (or the innards of a vanilla bean)
1 tbsp liqueur, optional, but choose what will work well with your cheesecake

Method:
1. Preheat oven to 180C = Moderate heat). Begin to boil a large pot of water for the water bath.

2. Mix together the crust ingredients and press into your preferred pan. You can press the crust just into the bottom, or up the sides of the pan too - baker's choice. Set crust aside.


Remove the cream from the cookies. Anyone up for Oreo cream?


Melt Butter


Mix butter with crushed Oreo biscuits


It will then look like this


Oh yes! Not to forget, line the pan before you do anything else!


3. Combine cream cheese and sugar in the bowl of a stand-mixer (or in a large bowl if using a hand-mixer) and cream together until smooth. Add eggs, one at a time, fully incorporating each before adding the next. Make sure to scrape down the bowl in between each egg. Add heavy cream, vanilla, lemon juice, and alcohol and blend until smooth and creamy. The batter should then look like this.


4. Pour batter into prepared crust and tap the pan on the counter a few times to bring all air bubbles to the surface. Place pan into a larger pan and pour boiling water into the larger pan until halfway up the side of the cheesecake pan. If cheesecake pan is not airtight, cover bottom securely with foil before adding water.


Secure bottom with foil


5. Bake 45 to 55 minutes, until it is almost done - this can be hard to judge, but you're looking for the cake to hold together, but still have a lot of jiggle to it in the center. You don't want it to be completely firm at this stage. Close the oven door, turn the heat off, and let rest in the cooling oven for one hour. This lets the cake finish cooking and cool down gently enough so that it won't crack on the top. After one hour, remove cheesecake from oven and lift carefully out of water bath. Let it finish cooling on the counter, and then cover and put in the fridge to chill. Once fully chilled, it is ready to serve.

Pan note: The creator of this recipe used to use a springform pan, but no matter how well she wrapped the thing in tin foil, water would always seep in and make the crust soggy. Now she uses one of those 1-use foil "casserole" shaped pans from the grocery store. They're 8 or 9 inches wide and really deep, and best of all, water-tight. When it comes time to serve, just cut the foil away.

Prep notes: While the actual making of this cheesecake is a minimal time commitment, it does need to bake for almost an hour, cool in the oven for an hour, and chill overnight before it is served. 

While its baking in the oven, i melted some chocolate for the decoration.


After a long 45 mins, the cake's ready!


I covered the entire cake with ganache (not a very good job here)


The end result!

Doesn't it just look yum? 
Now, who wants to be a cake tester?? anyone??

Toodles~
Lilia